先日リリースされたDesignSupportLibraryについて調べたことを書いていきます。 なおこの記事で動作確認しているのは、SupportLibrary v22.2.0を使っています。
動作確認したサンプルプロジェクトでは、build.gradleに以下を追記しました。
dependencies {
    compile 'com.android.support:appcompat-v7:22.2.0'
    compile 'com.android.support:design:22.2.0'
}
TextInputLayout
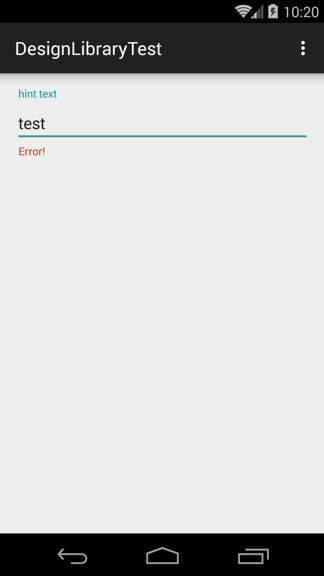
ドキュメントを読むと、このクラスはLinearLayoutのサブクラスとなっていて、EditTextのヒントテキストをフローティングラベルとして見せることが出来るようになるとのことです。あとはエラー表示にも対応しているみたいですね。
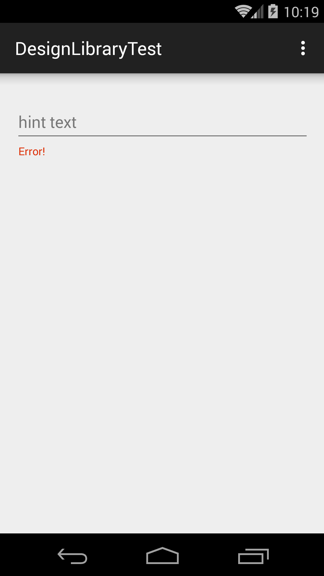
FloatingLabel付きEditTextの表示
以下のコードを動かしてみました。
<LinearLayout
    xmlns:android="http://schemas.android.com/apk/res/android"
    xmlns:tools="http://schemas.android.com/tools"
    android:layout_width="match_parent"
    android:layout_height="match_parent"
    android:paddingLeft="@dimen/activity_horizontal_margin"
    android:paddingRight="@dimen/activity_horizontal_margin"
    android:paddingTop="@dimen/activity_vertical_margin"
    android:paddingBottom="@dimen/activity_vertical_margin"
    android:orientation="vertical"
    tools:context=".MainActivity">

    <android.support.design.widget.TextInputLayout
        android:id="@+id/text_input_layout"
        android:layout_width="match_parent"
        android:layout_height="wrap_content">

        <EditText
            android:layout_width="match_parent"
            android:layout_height="wrap_content"
            android:hint="hint text"/>

    </android.support.design.widget.TextInputLayout>

</LinearLayout>
public class MainActivity extends AppCompatActivity {

    @Override
    protected void onCreate(Bundle savedInstanceState) {
        super.onCreate(savedInstanceState);
        setContentView(R.layout.activity_main);

        TextInputLayout textInputLayout = (TextInputLayout) findViewById(R.id.text_input_layout);
        textInputLayout.setErrorEnabled(true);
        textInputLayout.setError("Error!");
    }


Note: エラー表示を消したいときは、
setErrorEnabled(false)にすればいいようです。
ChildViewの追加
TextInputLayoutクラスにはaddView()メソッドが用意されているので、動的にViewを追加出来ます。
ただし、TextInputLayoutとEditTextは1対1でないといけないようです。試しにさっきのコードを以下のようにすると、例外が発生しました。
    @Override
    protected void onCreate(Bundle savedInstanceState) {
        super.onCreate(savedInstanceState);
        setContentView(R.layout.activity_main);

        TextInputLayout textInputLayout = (TextInputLayout) findViewById(R.id.text_input_layout);
        textInputLayout.setErrorEnabled(true);
        textInputLayout.setError("Error!");

        EditText editText = new EditText(this);
        textInputLayout.addView(editText, 0,
                new ViewGroup.LayoutParams(ViewGroup.LayoutParams.WRAP_CONTENT, ViewGroup.LayoutParams.WRAP_CONTENT));
    }
Caused by: java.lang.IllegalArgumentException: We already have an EditText, can only have one
JavaからEditTextを操作する場合は、以下のように書くとうまくいきました。
<LinearLayout
    xmlns:android="http://schemas.android.com/apk/res/android"
    xmlns:tools="http://schemas.android.com/tools"
    android:layout_width="match_parent"
    android:layout_height="match_parent"
    android:paddingLeft="@dimen/activity_horizontal_margin"
    android:paddingRight="@dimen/activity_horizontal_margin"
    android:paddingTop="@dimen/activity_vertical_margin"
    android:paddingBottom="@dimen/activity_vertical_margin"
    android:orientation="vertical"
    tools:context=".MainActivity">

    <android.support.design.widget.TextInputLayout
        android:id="@+id/text_input_layout"
        android:layout_width="match_parent"
        android:layout_height="wrap_content">

    </android.support.design.widget.TextInputLayout>

</LinearLayout>
public class MainActivity extends AppCompatActivity {

    @Override
    protected void onCreate(Bundle savedInstanceState) {
        super.onCreate(savedInstanceState);
        setContentView(R.layout.activity_main);

        TextInputLayout textInputLayout = (TextInputLayout) findViewById(R.id.text_input_layout);
        textInputLayout.setHint("hint text from setHint method");
        textInputLayout.setError("Error!");
        textInputLayout.setErrorEnabled(false);

        EditText editText = new EditText(this);
        textInputLayout.addView(editText, 0,
                new ViewGroup.LayoutParams(ViewGroup.LayoutParams.WRAP_CONTENT, ViewGroup.LayoutParams.WRAP_CONTENT));

        EditText editText2 = textInputLayout.getEditText();
        editText2.setText("text from setText method");
セットしたEditTextはgetEditTextで取り出すことが出来ます。
注意しなければいけないのは、テキストはEditTextにセットしますが、エラーとヒントはTextInputLayoutにセットする必要があります。

FloatingActionButton
待望のFloatingActionButtonクラスですね。 MaterialDesignのUIコンポーネントの中で最もメジャーであるにも関わらず、長い間3rd Party Libraryや独自実装に頼らざるを得なかったので、個人的にはDesignSupportLibraryで一番うれしいです。
FloatingActionButtonについてはClass Overviewでも、特定のアクションを促すためのボタンだと定義しています。
パッケージツリーを見ると、ImageViewを継承しているようです。
デフォルトの背景色は、アプリのテーマのcolorAccentが割り当てられます。
ちなみにこのクラスは、FloatingActionButton.Behaviorクラスを持っていますが、主にSnackBarと連携する際に用いるので、次回書くことにします。
FABの表示
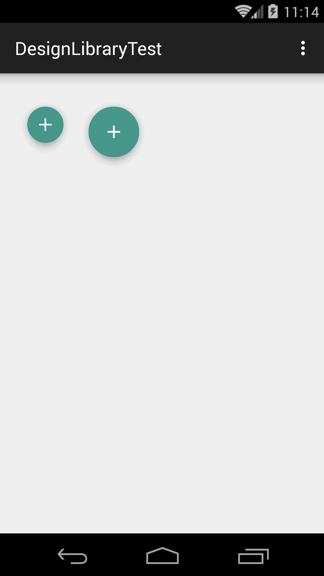
表示するだけであれば、layoutファイルに以下のように書くだけで大丈夫でした。
<LinearLayout
    xmlns:android="http://schemas.android.com/apk/res/android"
    xmlns:tools="http://schemas.android.com/tools"
    xmlns:design="http://schemas.android.com/apk/res-auto"
    android:layout_width="match_parent"
    android:layout_height="match_parent"
    android:paddingLeft="@dimen/activity_horizontal_margin"
    android:paddingRight="@dimen/activity_horizontal_margin"
    android:paddingTop="@dimen/activity_vertical_margin"
    android:paddingBottom="@dimen/activity_vertical_margin"
    android:orientation="horizontal"
    tools:context=".MainActivity">

    <android.support.design.widget.FloatingActionButton
        android:id="@+id/mini_fab"
        android:layout_width="wrap_content"
        android:layout_height="wrap_content"
        android:src="@drawable/ic_add_white_24dp"
        design:fabSize="mini"
        />

    <android.support.design.widget.FloatingActionButton
        android:id="@+id/normal_fab"
        android:layout_width="wrap_content"
        android:layout_height="wrap_content"
        android:src="@drawable/ic_add_white_24dp"
        design:fabSize="normal"
        />

</LinearLayout>

ちゃんと影も付いてます。タップ時には影も濃くなって、浮き上がるアニメーションになります。
FloatingActionButtonクラスは専用のAttributesを持っていて、FABのサイズを2パターン指定出来るようです。
背景色の変更
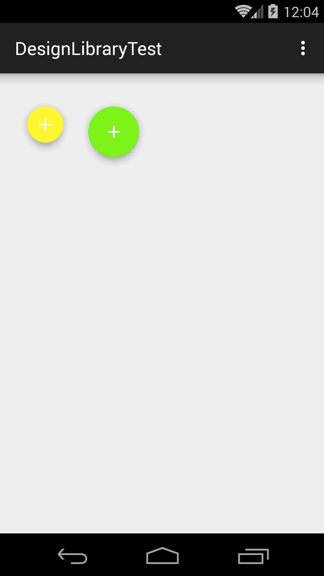
背景色を変えるには、setBackgroundTintList()メソッドが推奨されています。引数にはColorStateListを渡すので、ボタンの状態ごとに色を指定出来ます。
FloatingActionButton miniFab = (FloatingActionButton) findViewById(R.id.mini_fab);
FloatingActionButton normalFab = (FloatingActionButton) findViewById(R.id.normal_fab);
miniFab.setBackgroundTintList(ColorStateList.valueOf(Color.YELLOW));
normalFab.setBackgroundTintList(ColorStateList.valueOf(Color.GREEN));

あとsetRippleColor()というメソッドも用意されていて、KitKat以降のデバイスなら波紋のような描画をするとあるので、以下のコードを手元のKitKat端末で試しましたが確認出来ませんでした。
使い方が間違っているのかもしれません。
FloatingActionButton normalFab = (FloatingActionButton) findViewById(R.id.normal_fab);
normalFab.setRippleColor(Color.CYAN);